Barcode Scanning
How to scan your photos for barcode information
Smart Shooter has the ability to scan a photo and detect if it contains a barcode or QR code, and extract the text information from it. This text can then be used as part of the filename when saving the photo.
When a barcode is successfully scanned, it is saved and shown in the Barcodes table, and also populates the Barcode text box in the Session window.
The next time the app has to compute a photo filename, it will use this
barcode text to replace the [Z] parts of the filename expression. For
more information on how the filename expression works, see Name Policy.
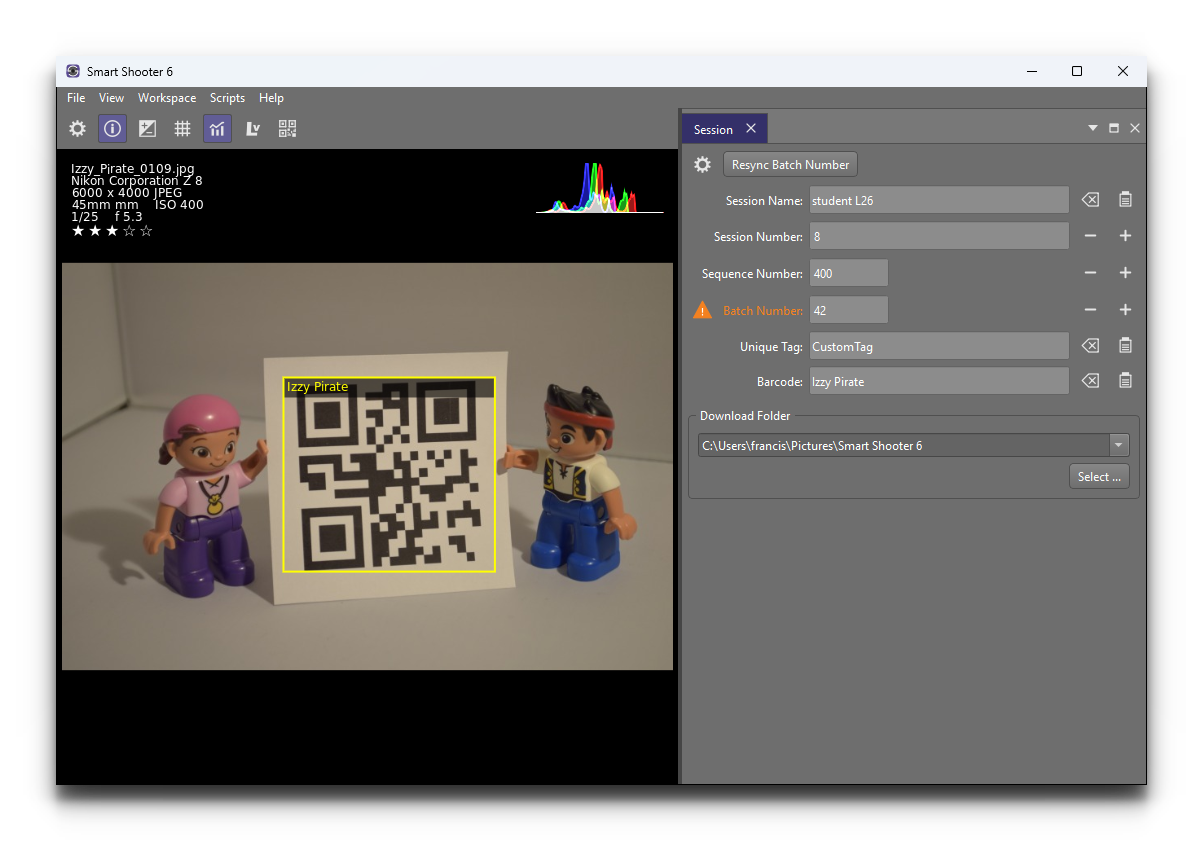
The screenshot above shows a demonstration. The QR code in the photo contains
the text Izzy Pirate. After the photo was taken, it was
automatically downloaded and then scanned for a barcode. The text was
extracted and then put in the Barcode text box in the
Session window. The filename used when saving the photo,
Izzy_Pirate_0109.jpg, contains the same text.
Automatic Scanning
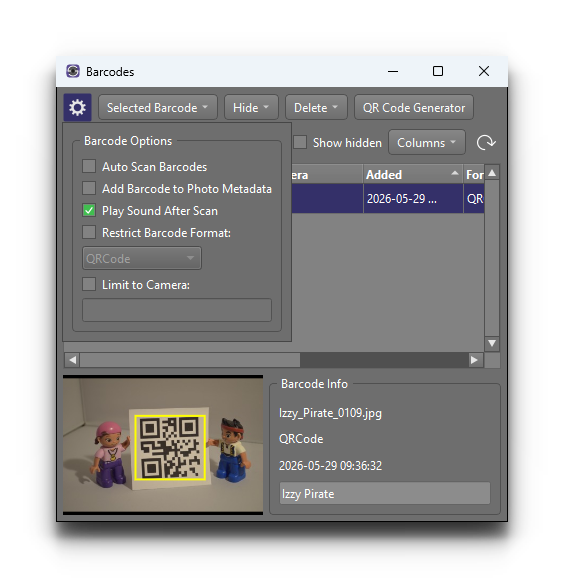
You can configure the app to automatically scan any new photos for a barcode. If you are using multiple cameras, this automatic scanning can be restricted to only scan photos taken by certain cameras. The screenshot below shows these in the Barcodes window.
Whenever a barcode is automatically scanned, it will affect the filename of that particular photo, and then all subsequent photos until another barcode is scanned.
Automatic scanning is also performed for liveview images, so a barcode can be extracted directly from the liveview stream even before a photo is taken.
Manually Scanning
The barcode scanning can be triggered manually at any time by pressing the
 button at the
top of the Preview window. The app will try to scan a barcode from
whichever image is visible at that time, and this can include a previously
taken photo or a liveview image.
button at the
top of the Preview window. The app will try to scan a barcode from
whichever image is visible at that time, and this can include a previously
taken photo or a liveview image.
Saving the Barcode in Photo Metadata
As well as using the barcode in the filename, the app can write the barcode text into the metadata of each photo as it is downloaded. This means the barcode stays with the photo even if the file is later renamed, and it can be read by other software that shows EXIF / XMP information.
To turn this on, in the Photos window click the options (gear) button and tick Add Metadata to Photos in the Photo Metadata section. This is turned off by default.
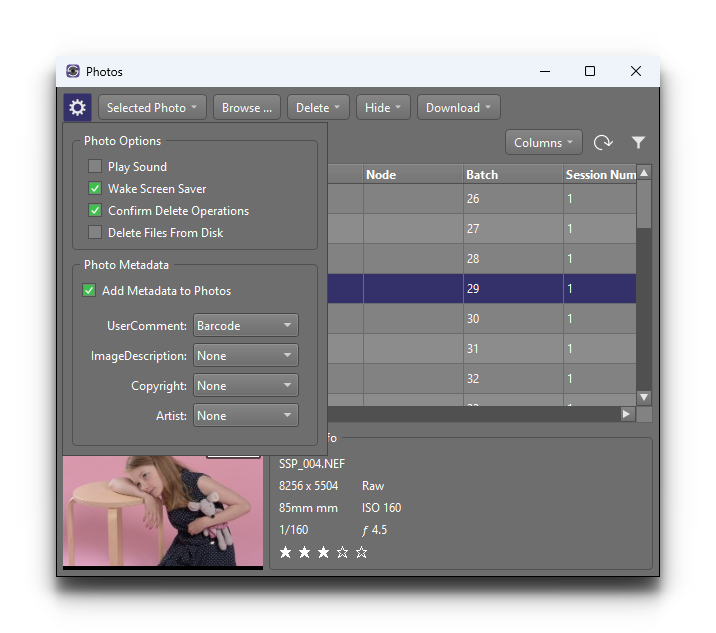
Below the checkbox there is a list of the metadata fields that the app can write, and for each one you can choose what information to put in it:
UserComment
ImageDescription
Copyright
Artist
By default the barcode is written to the UserComment field, and the other fields are left untouched. Each field can be set to Barcode, Session Name, Unique Tag, Camera Name or Camera Group, or to None to leave that field alone.
The metadata is added using the barcode that is current at the moment the
photo is downloaded — the same value that would be used for [Z] in the
filename. For more information on the other values that can be added, see
Adding Metadata to Photos.
Supported Barcode Types
The following barcode symbologies are supported:
Aztec
Codabar
Code 39
Code 93
Code 128
DataBar
DataBar Expanded
Data Matrix
EAN-8
EAN-13 / UPC-A
ITF (Interleaved 2 of 5)
MaxiCode
PDF417
QR Code
UPC-E
Smart Shooter uses the ZXing open source library for detecting barcodes. Their website is: https://github.com/zxing-cpp/zxing-cpp
Using an External Barcode Scanner
It’s also possible to use an external barcode scanner with the app. As long as this is also connected to the same computer, and can be configured to enter text in a UI text box, you can have it fill in the Barcode text box of the Session window.