Dashboard
Monitoring multiple cameras at a glance
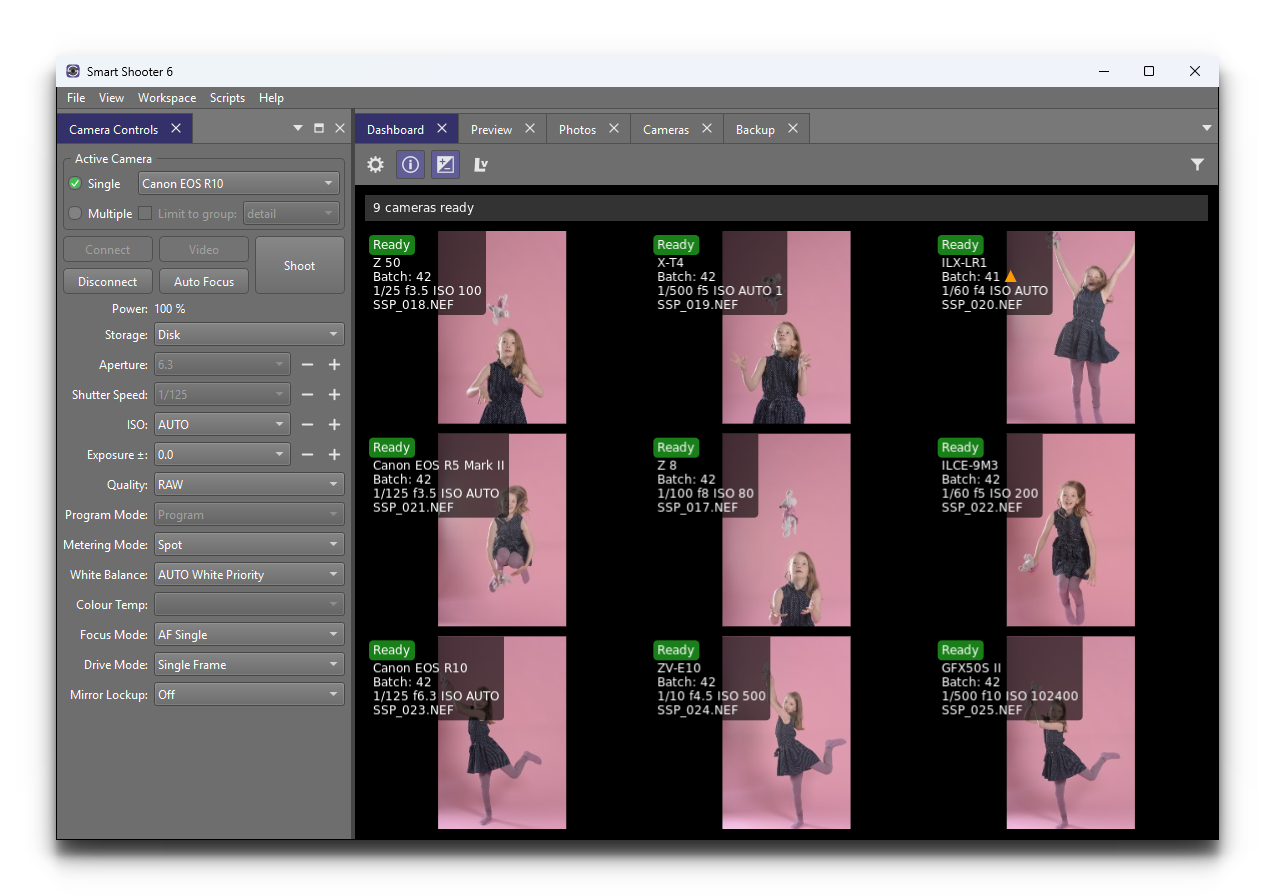
The Dashboard gives a live overview of every connected camera, with each camera shown as its own tile in a grid layout. When shooting with more than one camera, it is the quickest way to see the state of the whole setup at once, without switching between windows.
The Dashboard is not part of the default layout, because Smart Shooter opens with the Preview window in focus. Open it from the menu, as described in Showing and Hiding Panes. Once open it can be docked, floated or tabbed like any other pane, and kept as part of a saved workspace.
Tip
A common arrangement for multi-camera work is the Dashboard docked on one side of the screen and the Preview window on the other, so the overall state of the cameras and the most recent photo are both visible at the same time.
Camera Tiles
Each tile in the Dashboard represents one connected camera, and shows the information you most often need at a glance:
A status badge, such as Ready
The camera’s name
The session batch number
The current exposure settings — shutter speed, aperture and ISO
The filename of the most recently taken photo
A thumbnail of that photo
A bar above the tiles summarises the whole set, for example
9 cameras ready. The tiles are arranged in a grid that automatically
reflows to fit the available window size, and as cameras are added or
removed the layout adjusts accordingly.
Keyboard shortcuts such as T (take photo) and F (auto focus) act
on the active camera rather than on the Dashboard selection. For the full
list, and for how the active camera is chosen, see
Keyboard Shortcuts.
Toolbar
A toolbar at the top of the Dashboard provides quick access to the view controls:
- Options
Opens the Dashboard display options.
- Show Info
Toggles the information overlay drawn on each camera tile.
- Highlight Camera Warnings
Draws attention to cameras that need it — see the tip below.
- Live View Overlay Options
Controls how the live view stream is shown within the tiles.
- Show Filters
Shows or hides the filter bar described in the next section.
Tip
The toolbar’s Highlight Camera Warnings toggle is one of the most useful elements in the Dashboard for live shooting. When enabled, any camera with a problem — a disconnection, a batch number mismatch between cameras, or any other condition that could affect the shoot — is highlighted and flashes in the tile layout, drawing your attention to it.
During a session this means a glance at the Dashboard is enough to spot trouble, without inspecting every camera tile individually.
Filtering and Sorting
The Show Filters button on the toolbar reveals a filter bar above the tiles, for narrowing and ordering the visible set of cameras.
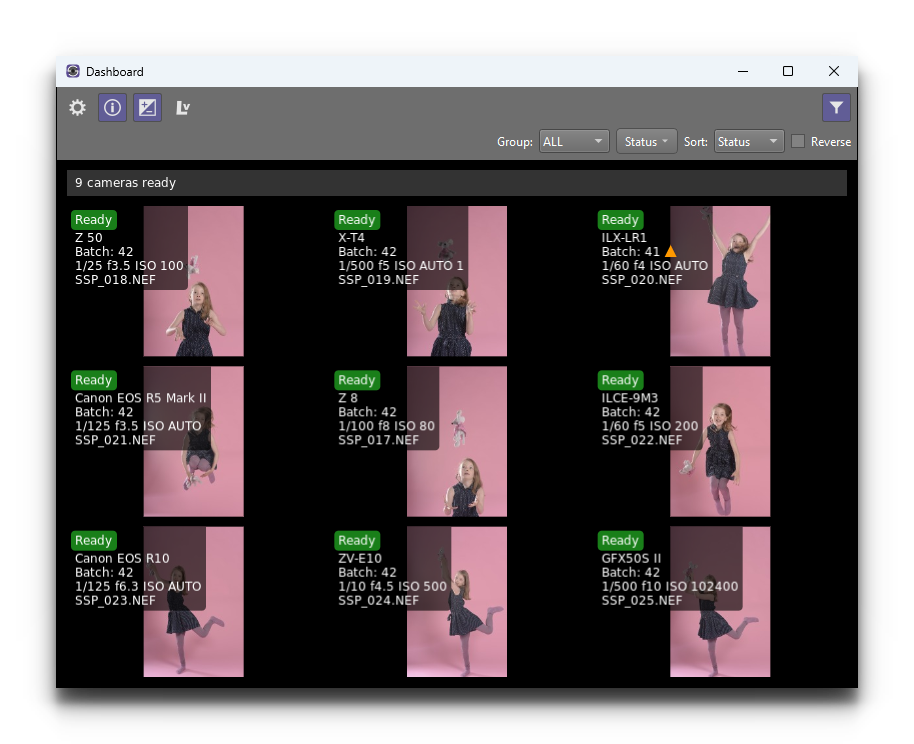
- Group
Limits the view to cameras in a specific group. For more on creating and using camera groups, see Active Camera.
- Status
Limits the view to cameras in the selected states, chosen from a drop-down menu.
- Sort
Chooses the property the tiles are ordered by. The Reverse checkbox alongside it reverses that order.
Relationship to Other Windows
The Dashboard is the overview. For deeper inspection of any individual camera or photo, the app provides dedicated windows:
For per-camera live view, focus and zoom, see the Live View window described in Viewing Cameras.
For the tabular view of every camera and its settings, see the Cameras window described in Viewing Cameras.
For full-size photo preview, zoom and per-photo actions, see Viewing Photos.